The Back Squat: The One Lift That Rewrites Your Body From the Ground Up
No exercise builds more total-body strength, size, and grit than a heavy back squat. And no exercise gets more misinterpreted. Here's the exact stance, brace, descent and drive we teach every Onyx lifter, from first-week beginners to seasoned powerlifters.

Simen Christiansen
Onyx Head Coach
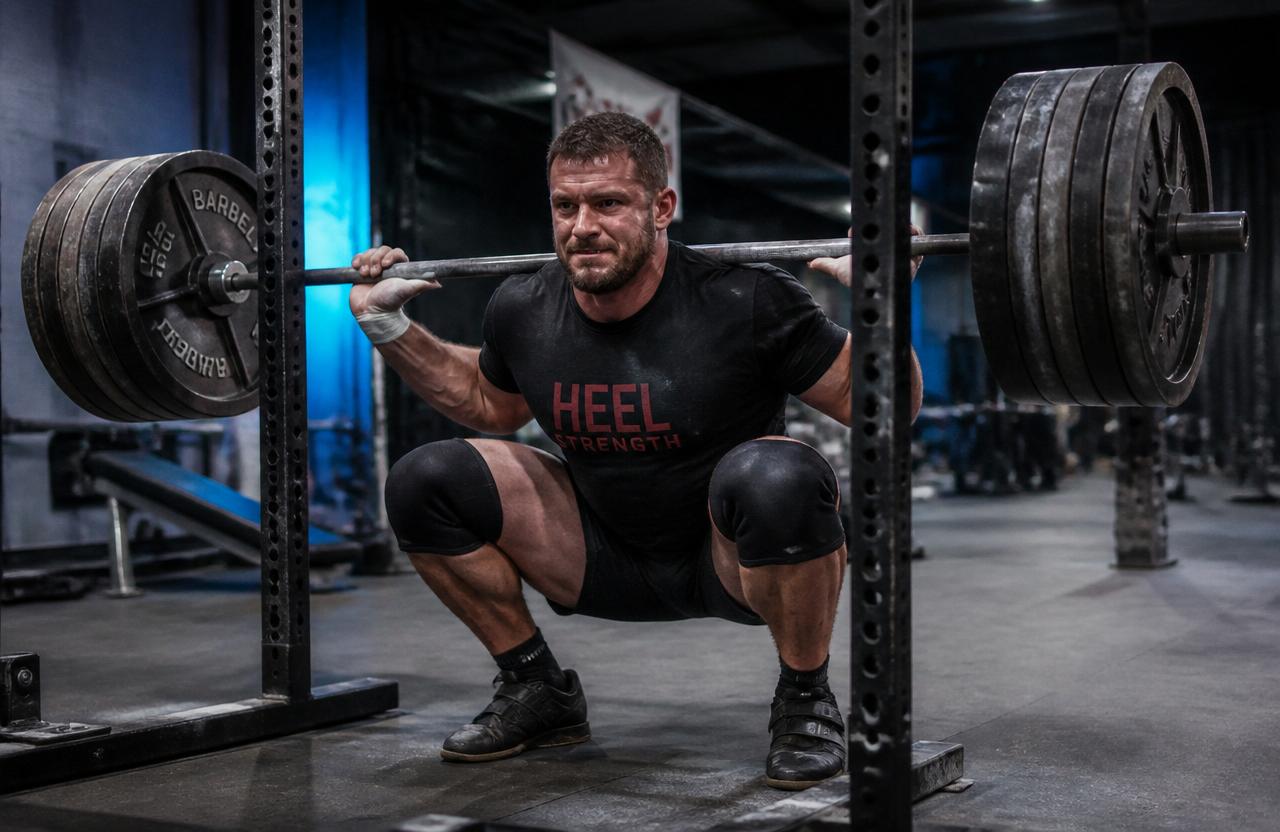
Shoulders-1.5x
Stance width
Hip crease < knee
Depth
Every rep
Brace 360°
Vertical over midfoot
Bar path
The back squat is the most demanding lift in the gym. Not because it is complicated - it isn't - but because it demands full-body coordination under real load. Learn to squat well and every other lower-body movement gets easier. Learn to squat badly and your knees, back, and hips will remind you for years.
— The setup
01Rack height, bar position, and the unrack
The lift begins before you unrack. J-hooks should sit so the bar is roughly at mid-sternum height when you're standing tall. Too high and you tiptoe out. Too low and you burn a quarter-squat of energy just clearing the rack.
Bar position - high bar vs low bar
- High bar: bar on top of the traps, torso more upright, more quad-dominant, easier to learn
- Low bar: bar across the rear delts, more forward lean, more hip-dominant, moves the most weight
- Beginners: start high bar for 6-12 months. Migrate to low bar only if the sport demands it
— Stance and brace
02Where your feet go, and how to breathe into a belt
- Feet roughly shoulder-width to 1.5x shoulder-width for most lifters
- Toes turned out 15-30° - pick the angle where your hip lets you sink to depth without the knee caving
- Weight distributed across the whole foot: heel, ball, pinky toe - the 'tripod'
- Big toe glued to the floor at all times - it drives external rotation of the hip
"You cannot squat heavy weights with a weak brace. The brace is not optional. It is the lift."
— The descent
03Sit between the hips, not down onto the knees
The most common cue in the gym - 'sit back' - is only half right. Sit back too much and you turn a squat into a good morning. Sit straight down and your knees track over your toes but you fold at the hips.
The correct feeling: sit BETWEEN your hips. Break at the hips and knees at the same time. Push the knees out over the pinky toes as you descend. Your torso will lean forward - that's fine and correct. Keep the bar directly over the midfoot the entire way down.
Depth - what actually counts
- Powerlifting standard: hip crease breaks parallel to the top of the knee
- Bodybuilding standard: as deep as your hips let you go without the pelvis tucking (butt wink)
- If the pelvis tucks under - stop there, that is your true depth. Force depth beyond it and the lumbar spine takes load it shouldn't
— The drive
04Chest up, hips and shoulders rise together
Out of the hole, the mistake is letting the hips shoot up first. Your torso pitches forward, the squat becomes a good morning, and your lower back becomes the primary mover of a heavy weight. Fix it with a single cue: 'chest up as you drive'. The hips and shoulders should rise at exactly the same rate.
- Drive the whole foot into the floor - never rock forward onto the toes
- Push the knees out through the ascent too, not just the descent
- Keep the bar over the midfoot the whole way up
- Finish tall, glutes squeezed, brace still held - THEN exhale
— Common mistakes
05The four squat killers we see every week
- Knees caving in (valgus) - fix with 'spread the floor' cue and glute med work
- Heels lifting - ankle mobility issue, use lifting shoes or squat wedges until it improves
- Butt wink at depth - stop at the depth your pelvis stays neutral, and mobilise the hips outside of training
- Hips shoot up out of the hole - the weight is too heavy OR the brace collapsed. Both call for a lighter working weight and better bracing
— Programming
06How to squat for the next 10 years, not the next 10 weeks
- Squat 2x per week for most lifters - one heavier day (3-5 reps @ RPE 7-8) and one lighter/volume day (5-8 reps for 3-4 sets)
- Rotate a squat variation every 6-8 weeks - pause squats, front squats, tempo squats - to keep hips and knees healthy
- Never redline squats for more than 3 weeks in a row without a deload
- Pair every squat day with dedicated hip and ankle mobility - 10 minutes before, 5 minutes after
- Warm-up sets: empty bar x 8, then 40% x 5, 60% x 3, 75% x 2, 85% x 1 before working sets
The Cheat Sheet
Key takeaways
- 1Bar over midfoot from the walkout to the final rep - always
- 2Brace 360° into the belly, hold through the rep, exhale at the top
- 3Sit between the hips, knees push out, chest stays proud
- 4Depth stops where the pelvis stops staying neutral
- 5Squat twice a week, deload every fourth, rotate variations every 6-8 weeks
Written by
Simen Christiansen
Onyx Head Coach · Onyx Performance